
Pavlova Tips

Whenever we have an extended family gathering my mother (she is 85) will make a pavlova. It's just one of those things. Topped with whipped cream & fresh fruit (or a little chocolate) they are great. My favourite is raspberries & cream with a few shavings of dark bittersweet chocolate - mmmmm.
I know Mum's recipe, it's simple; egg whites, caster sugar, vanilla & vinegar. I honestly didn't think there were many different versions until I was at a meeting of the local branch of the Victorian Coeliac Society. We were talking about how some people can make pavlovas & some people can't - it's a bit like sponge cakes. That led to a discussion of what's in them. To my surprise someone added hot water & corn flour (maize starch) but no vinegar. So making pavlovas might not be as simple as I first thought.
I'll tell you a secret, I had never made a pav before last week. I'd made meringues & plenty of them but I never needed to make a pav, Mum made the pavs. As Mum's pav recipe wasn't the only one out there I decided I better do a little searching on the net before I embarked on a pav making spree (the recipe I now follow is at the very end of this page).
OOOOkay - the ingredients are simple & mostly the same.
Egg whites & sugar are definitely in all recipes.
The following are maybes and are usually only added in small amounts;
vinegar
lemon juice
water
vanilla
maize starch
potato starch
BUT
(and it really has to be a big but)
the quantity of sugar in relation to egg whites differs considerably.
When I say "differs considerably" I am not exaggerating. I looked at 9 pavlova recipes (including my Mum's) and they were all different in the amount of sugar added per egg white. I can understand if the amount of sugar differs by a little bit - someone may use different size eggs. However, the differences in the amount of sugar weren't all small - one recipe contained 4 x the amount of sugar than another recipe.
So how much sugar should be used?
Basically the amount of sugar added has to dissolve in the egg whites while the egg whites are being beaten - that sounds relatively simple. Of course it is going to depend on the size of the egg white. Only 1 of the recipes specified a weight for the egg whites, all other recipes would use 2, 3, 4 or 6 egg whites.
Tip 1: Use "warm" eggs
Another factor affecting how quickly the sugar dissolves is the temperature of the egg whites. Don't use eggs straight out of the fridge, leave them at room temperature for a while. I "warm" my whole eggs first by putting them in a sink full of hot tap water for ~10 mins. This doesn't cook the egg but warms the white making it less viscous, easier to whip & easier for the sugar to dissolve. Separating the whites & yolks is slightly harder in warm eggs.
I found a great website that explains the types of eggs that should be used & why. The website is called No Recipes & is run by Marc Matsumoto, a chef.
Tip 2: Weigh your egg whites
The amount of sugar needed will depend on how much egg white is going to be used. A pavlova made with 4 egg whites will comfortably serve 8 people.

Tip 3: Sugar (g) = 1.65 x egg whites (g)
If your eggs are extra large (700 g/1 dozen) the whites will be approximately 35 g each. The amount of sugar a 4 egg white pavlova will need is;
Weight of egg whites = 4 x 35 g = 140 g
Sugar = 1.65 x 140 g = 231 g
There are a couple of reasons why I use 1.65 x the weight of the whites. One of the delights of pavlova is the crunchy meringue exterior combined with the light marshmallow interior. Yummo! Too little sugar & you miss out on a lot of marshmallow, too much sugar & the pav is a little grainy (& it can weep). Basically you want to put in as much sugar that will dissolve. That is, of course, if you like the marshmallow middle. Sometimes I might beat my egg whites a little fast & I know that I cannot dissolve sugar that is 2 x the weight of the egg whites. However I do know that I can successfully dissolve sugar that is 1.5 x the weight of the whites (Meringues). I tried pavs made with 1.75 x but the sugar hadn't dissolved. So I settled on adding in 1.65 x the weight of the whites.
Of the recipes I found on the net the amount of sugar varies from 1.14 x the weight of the egg whites to 4.64 x - I have based this on an egg white weighing ~35 g. The amount of sugar in the latter recipe will not dissolve so it is no surprise that water was also included in the recipe. Adding water will result in a lighter marshmallow middle but if you leave the pav in the oven for too long there is more water to weep out (I made a couple of pavs with water added).
Another reason I chose 1.65 x was that my tastebuds found that greater amounts of sugar made the pav too sickly sweet. I know they are supposed to be sweet & I didn't have anything on the meringue to cut the sweetness but I found the pavs made with sugar greater than 2 x the weight of the egg whites cloying. I asked my daughter to taste the pavs, at that time there were 6, and she preferred the one made with 1.65 x.
Tip 4: Use caster sugar
Basically the finer the sugar the easier it is to dissolve.

Tip 5: Clean your bowl & whisk
Remove all traces of fat from your bowl & whisk. I know I can get away with a little yolk in the whites when I am making meringues but it is a different story when making pavs. Well sort of. If there is a little bit of yolk in the mix the egg white & sugar foam won't be as stable as it could be. It also won't have reached the volume that it would normally get to. When it is in the oven the pav will increase in volume & will crack the outside. When taken out of the oven it will deflate.
If you don't want to start again you could add in another egg white without increasing the sugar content. Add in a teaspoon of maize starch to help stabilize the foam. Cracks & any bits of the pav that are weeping can be covered up with cream, fruit or fruit puree. If you think it really is a disaster break the pav into large chunks & turn it into Eton Mess.
The pavlova pictured below didn't have egg yolk in the whites, instead I made it by first dissolving the sugar in the whites & then whisking them together.

Tip 6: Control the speed
Egg whites can be over whisked & sugar will not dissolve in over whisked egg whites. I've noticed on a lot of stand mixers that the stated speed for whisking egg whites is nearly full bore. If you whisk them at this set speed you will not have enough time to add the sugar before the egg whites are over whisked. Start whisking egg whites using a stand mixer at approximately 1/2 the maximum speed. When the egg whites have been whisked to the soft peak stage start adding the sugar - gradually. It usually takes me 2-3 minutes to add all the sugar. After the sugar has been completely added the speed of the mixer can be turned up.
Whisking the egg whites first before adding the sugar is needed to maximize the volume of the egg whites. Pavs made with egg whites that were whisked well before adding the sugar should have fewer cracks in them.
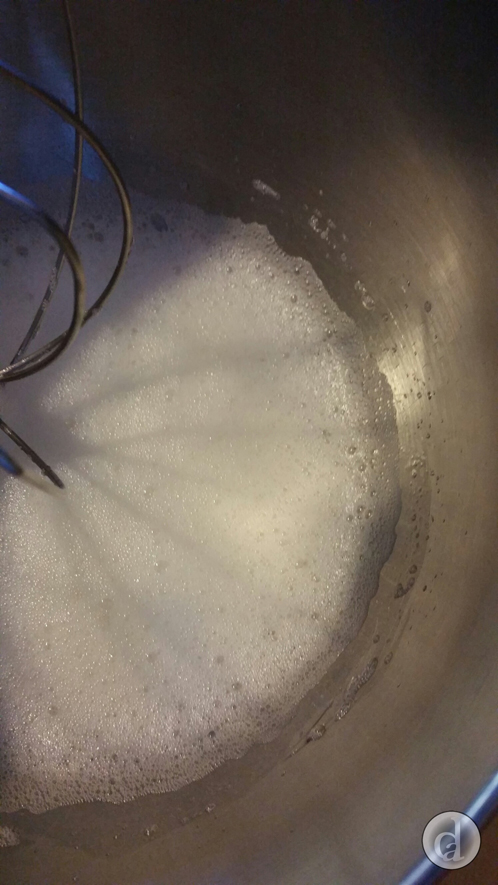 Before starting to add the sugar wait until soft peaks form.

The foam is getting tighter but I wait a little longer before starting to add the sugar.

Start adding sugar slowly while the mixer is still whisking the egg whites. Gently shake the sugar onto the egg whites. If some sugar gets on the side of the bowl wait until all sugar has been added before scrapping down the sides. It usually takes me 2-3 minutes to slowly add all the sugar. The mixture will become glossy.

When all the sugar has been added scrape down the sides of the bowl. Continue to whisk the egg whites for approximately 5 mins. The mixture will still be glossy but will thicken considerably. If you test a bit of the mixture between your finger tips it will still be slightly gritty - not all the sugar has dissolved.

After 5 mins add vanilla and/or vinegar - these are optional. The reason for adding vinegar is explained later. Continue whisking for approximately 5 mins. If you rub some of the mixture between your fingertips it may still be slightly gritty if so continue to whisk the mix.

Continue to test the mixture by either rubbing it between your fingers or tasting a little bit. The tongue is very sensitive & will easily detect any solid sugar crystals. The latter method involves ingesting raw egg white & is therefore not recommended if you are uncertain of the quality of the egg. Keep whisking the egg whites if not all the sugar is dissolved.

At last the sugar has dissolved. At this stage the mixture is very glossy & very thick.

Transfer the meringue to a baking tray lined with aluminium foil. My mum has always used foil, she was making pavs before you could buy baking paper. I use baking paper for meringues but I found it is easier to get the pav off foil rather baking paper.

Tip 7: Baking Temperature
The baking temperature is another one of those things that varies considerably from recipe to recipe. Do we bake them at 200 C, 150 C, 120 C or some other temperature? In part the baking temperature will depend on your oven & how much colour you want your pav to have.
Two things that I think are essential for pavs are the crunchy exterior & the delicious marshmallow middle. It's simple, we need these in a pav. So what baking temperature will turn our raw meringue into something wonderful. Basically it comes down to setting/cooking the egg white in the middle of the pav. Egg whites are cooked at 80 C so we know that the baking temperature has to be above 80 C. If the middle of your pav doesn't reach 80 C the marshmallow is not completely cooked & it will not be stable. Too much unstable marshmallow, the pav will collapse & it will weep.
Below are photos of raw meringue & the corresponding pav baked at 90 C.

Is 90 C hot enough to bake a pav? Not really - you could - however you miss out on the wonderful caramelisation of the exterior. If you want a pav that has no colour & no cracks you could bake it at this low temperature.
What happens to the pav if the baking temperature is increased to 100 C? Water present in the egg white will turn to steam. The steam produced will occupy a larger space than the water did & as a consequence will probably crack your pav. If too much water evaporates the marshmallow will shrink, making it tougher to eat.
Pictured below are photos of raw meringue & the corresponding pav baked at 100 C. The outside of the pav hasn't caramelised & you can see some cracks in the top.


Some caramelisation of the sugar will occur if a pav is baked at 120 C. You do need to know whether your oven runs true to temperature. It may be a case of trial & error. Below are photos of pavs baked at 120 C in my oven & my mum's oven (very old). The difference in colour is remarkable. Ooops the squashed pavlova was the result of me not dissolving the sugar completely (& possibly leaving it in the oven too long).


If we increase the temperature to 150 C there will definitely be caramelisation of the outside of the pav. To show caramelisation at 150 C I took the pav I had baked at 90 C & put it in the oven at 150 C for 20 mins. It only had a little chunk missing.


Only 20 mins was required to develop a beautiful caramelisation of the outside. Cracks formed in the shell when the marshmallow expanded as a consequence of water in the egg white turning to steam. When the pav is first taken out of the oven the cracks will be quite wide. The cracks close up as the pav cools.
One of the pav recipes on the web advised to set the oven to 200 C, put the pav in, reduce the temperature to 120 C & bake the pav for 45 mins. After 45 mins the door to the oven is left open to allow the pav to cool down. I tried this with the pav I had made by first dissolving the sugar in the egg whites & then whisking them together. Dissolving the sugar this way will result in a cracked pavlova (more so than normal) simply because the egg whites didn't achieve maximum volume. Within 5 mins in the oven the outside of the pav had started to brown (photo below).

One of the things I noticed about pavs that had been cooked at 150 C or above (in my oven) was that they had a thinner crust than the ones I baked at 120 C for slightly longer. A thinner crust will mean that the resulting pav may collapse under the weight of the fruit/cream. My children preferred the thicker crust but they liked a bit of caramelisation on it as well. To solve this dilemma I decided to bake a pav at 90 C for 1 hour I then increased the temperature to 150 C for 30 mins while the pav was in the oven (photo below).

The internal temperature of the pav was ~72 C after 1 hour in the oven at 90 C & a good crust had developed. After 30 mins at 150 C the internal temperature was ~84 C. This pav had a good crust, great marshmallow, few cracks & had caramelisation of the crust. Maybe the pav had a bit too much caramelisation for my liking so next time I make one I would probably bake at 90 C then increase the temperature to ~130 C instead of 150 C.
The temperature at which you bake your pav will be dependent on your oven. In the future I will probably be baking my pavs at 90 C first, letting them cool before finishing them off at a higher temperature.
Tip 8: Baking Time
The baking time will be dependent on the size of the pav, your oven & the temperature you are baking the pav. When I say your oven I'm referring to, for example; whether your oven cools down quickly or it retains heat very well, whether it tends to dry things out quickly or it takes quite a while to dry things, whether your oven is fan forced or not. All of these things will effect the baking time of the pav.
Putting the above aside the most important thing when baking a pav is to get the middle of it above 80 C. How do you know if it is above 80 C? A simple way of determining the temperature of the middle is to stick a probe thermometer in the pav. The tiny hole could be covered with fruit or cream.
In my oven the middle of the pav (4 egg whites) was above 80 C when;
The pav was baked in the oven for 45 mins. The oven was set to 200 C then turned down to 120 C.
The pav was baked in the oven for just over an hour. The oven was set to 120 C.
You may be thinking why not just leave the pav in the oven for longer to ensure that the middle is cooked. Unfortunately there is one major problem associated with leaving the pav in the oven for too long - weeping pavs. Weeping can occur when the middle of the pav has dried out too much. Essentially when the marshmallow in the middle is above 100 C, some of the water associated with the egg white is going to turn to steam. This will change the concentration of the sugar associated with the egg white. As the pav cools down the sugar may start to crystallise but it will probably dissolve in any water remaining in the marshmallow. This sugary water is some of the stuff that weeps out of pavs.
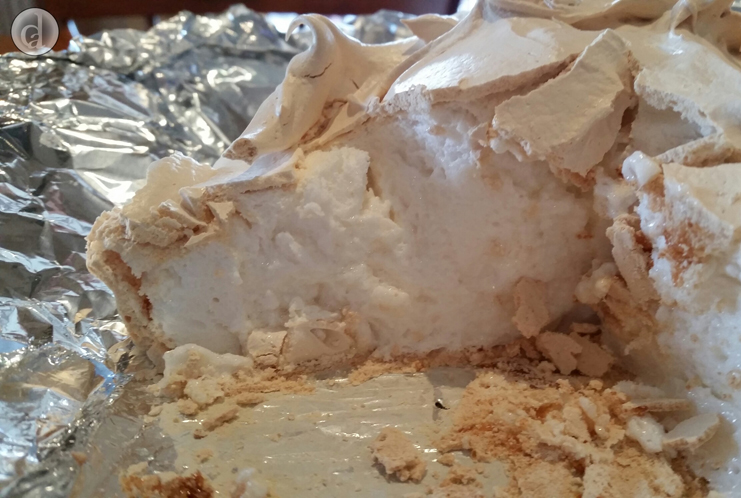
When the pav is in the oven the outside starts to set & dry out while the middle gets warmer - essentially the hotter the oven the faster this will happen. In addition, the longer you leave the pav in the oven (with a temperature over 100 C) the thicker the crust - this is actually to a certain thickness & then the marshmallow pulls away from the sides (photos below).


When the marshmallow starts to pull away from the sides it means that the marshmallow is shrinking. So at this stage the marshmallow could be getting a little tougher & some of the water from the egg whites will start seeping out (weeping).
How much crust you want will be up to you. My Mum's pavs always look like the one pictured on the above right. She carefully takes off the top, puts the whipped cream & fruit on top of the marshmallow (filling the space between the marshmallow & crust) & then carefully puts the top back on. Through the cracks in the top you get glimpses of the fruit & cream beneath. Of course you could shape the pav with an indent in the middle & use it to arrange the fruit & cream.
I thought the crust on the pav (above left photo) wasn't thick enough. It just didn't have that satisfying crunch. I liked the crust on both of the pavs (photos below) however I preferred the one on the right. It had great caramelisation & the marshmallow was light & fluffy.

Tip 9: Shape
The shape of your pav will depend on a number of things, for example;
- Do you want lots of marshmallow or lots of thick crust?
- How many you are going to feed.
- Are you making individual pavs or 1 large one?
- Whether you want to make it a specific shape (heart).
All of the above will have an impact on the cooking time & the temperature at which you cook the pav. A pav piled high (to make heaps of marshmallow) will take longer to cook than one that is spread out. In this instance you may want to decrease the cooking temperature for the pav that is piled high to stop the crust becoming too dark.


I didn't like the above shapes for making a pav. Where would I put the fruit on the pav on the left & as for the pav on the right it looks like a flat pancake.
So I decided to shape the pav with an indent for the fruit & a bit of decoration. The latter was to stop it looking like the raw meringue had just been plonked on the tray. Another reason for the decoration was to try to minimise cracks. As the raw meringue starts to cook it expands a little & depending on the shape cracks can form in the crust. I decided to decorate the pav with stars around the outside. Hopefully as the meringue expands during cooking the expansion will fill out the stars instead of cracking the outside.
I left my first attempt in the oven too long. The pav cracked more than I wanted it too & the marshmallow had come away from the sides a bit too much resulting in a bit of weeping.


Too many cracks for my liking.
My second attempt was a lot better.

I used just over half the raw meringue to make a round disk. The remaining meringue was put into a piping bag fitted with a size 13 star nozzle & used for the 2 rows of stars around the outside of the disk. It was first baked at 90 C for ~90 mins (I think it was a bit too long). Next time I would bake it for ~75 mins (if making a pav of the same shape using 4 egg whites).

The hole in the middle of the pav is where I put in the probe thermometer. The pav was taken out of the oven & cooled down. It was then baked in the oven at 150 C for 10 mins to caramelise the outside a bit.

Some cracks had started forming but they are quite small.

A dusting of raspberry powder & the cracks are no longer visible.

Tip 10: Know your mixer
It might sound silly but you need to know how many egg whites your mixer will be able to whisk (successfully). I have an old Kitchen Aid heavy duty plus stand mixer, the bowls have a capacity of 6 L. I know that I can successfully whisk 4 egg whites when making a pav - not so for 6 egg whites. Using my stand mixer the raw meringue from 6 egg whites is simply not thick enough (been there, done that & watched the pav crack, sink & flop). My advice would be to firstly make a pav with 3 egg whites. If you can not see the tops of your beaters/whisk when you are whisking the egg whites there is too much in there.
Tip 11: Other ingredients
These were;
vinegar - acid
lemon juice - acid
water
vanilla - flavour
maize starch - starch
potato starch - starch
Essentially other ingredients usually added are; an acid, flavouring or starch.
Adding Acid - Mum always adds a teaspoon of vinegar to her pavs. I thought adding vinegar had something to do with stopping the sugar crystallising too much but this is not the case. Below is a quote taken from the No Recipes website & it explains why an acid is added when making pavs.
"When egg whites are fresh, the proteins start off tightly folded, which is why they’re more viscous. This makes it much more difficult to beat air into them, resulting in a foam with less volume. However, fresh eggs also contain more carbon dioxide, which makes the whites cloudy and more pH neutral. This is significant because a fresh egg is less likely to form sulfur bonds that lead to an unstable foam.
Old eggs on the other hand have more relaxed proteins making them runnier and easier to beat into a foam with more volume. The trouble is that as eggs age, they release the carbon dioxide and become more alkaline, which results in a less stable foam. The trick here is to lower the pH of the egg white by adding an acid such as vinegar or cream of tartar as your meringue reaches maximum volume."
Adding Water - The recipes I have looked at that contain water also contain a great deal of sugar. Adding water isn't necessary if you use sugar that is 1.65 x the weight of the egg whites.
Adding Flavourings/Colours - A common flavouring added to pavs is vanilla (1 tsp/4 egg whites). There are plenty of other flavours that can be added eg coffee & rose water.
Starch - Adding starch helps stabilise the foam, the amount added is usually 1 tsp/~4 egg whites. It can make the marshmallow slightly denser than the marshmallow would be if there was no starch. However if starch isn't added there is an increased probability that the pav will weep.
My Recipe
4 Egg whites weighed
Sugar 1.65 x the weight of the egg whites
1 tsp Vinegar
1 tsp Vanilla or Rose water etc
1 tsp Maize starch
Mix as described in Tip 6
Bake at 90 C for approximately 75 mins
Bring out of the oven & allow to cool
Brown in oven 150 C - 200 C for approximately 10 mins
Bring out & allow to cool before decorating