Pizza

I designed this recipe so that the pizza can be eaten hot (who wants to eat cold pizza). Unlike a lot of the other bread recipes made with Bakers' Magic Gluten free flour that require the bread to be quite cool before you can cut into it the pizza bases are at their best straight out of the oven. This is how it should be served - don't let it cool down too much. When they come out of the oven the edge is deliciously crispy!
This recipe was designed specifically to be made with Bakers' Magic gluten free flour. The finished baked product will not be the same if you use another gluten free flour and you will need to adjust the recipe, particularly if the flour you're using contains rice flour.
Ingredients
350 g Bakers' Magic Gluten free flour
100 g Maize starch
2 tsp Yeast
3 tsp Sugar
2 tsp Salt
525 g Warm water*
50 g Oil
Extra oil for putting dough on trays
*This amount of water includes the 100 g required for pre incubating the yeast.
Other ingredients are required as toppings
This amount of pizza dough is sufficient to make 4 pizza bases (28 cm diameter) using ~250 g of dough. The crust is thin (see photos below) & 1/2 of a pizza crust is approximately the same as 2 slices of bread. If you want a thicker crust then make 3 pizza bases each with ~350 g of dough. Adding more dough doesn't necessarily mean a thicker crust, the weight of the toppings can push down on the dough & then it doesn't rise well.
Method
Warm water is ~1/4 to 1/3 of boiling water with the remaining cold water (tap). Whether you use 1/4 or 1/3 will depend on how cold your tap water is. If the water is too hot it will kill the yeast.
Pre-incubate the yeast at room temperature for approximately 5 - 8 mins in 100 g of warm water containing the sugar. Stir the mixture to dissolve the sugar & disperse the yeast. This gives the yeast a readily available food source & they can "revive" in a relatively undisturbed environment. After the allocated time the surface of the yeast mixture should be slightly frothy. This indicates the yeast are viable.
If the yeast mixture has a frothy top or you can see bubbles proceed with bread making.
Are you going to proof the dough in your oven or in another warm spot? If proofing in your oven turn oven to ~50 C for approximately 10 mins then turn it off again.
Oil 4 pizza trays. They don't have to be pizza trays.
Thermomix
Place ingredients in the TM bowl (including pre-incubated yeast).
Mix @ 37o C for 2.5 mins at speed 4.
Ensure all ingredients are incorporated. If not, scrape down the sides and briefly mix again.
Stand Mixer
Place all ingredients into the mixing bowl (including pre-incubated yeast).
Combine ingredients using the flat beater until a uniform consistency is achieved. You may need to stop the mixer and scrap down the sides. This make take longer than 5 mins.
Both Methods
The dough is ready for proofing.
The dough made in a stand mixer is slightly easier to handle than the dough made in a Thermomix. Essentially 1/4 of the dough will go onto a tray if making 4 pizzas or 1/3 of the dough if only making 3. Transfer the amount required to each of the oiled trays.
The next part is a little messy (I can imagine some children will love doing this). I usually put some disposable gloves on & coat them with a bit of oil. Spread the dough on the tray to cover it completely, if you want make the edges slightly thicker. It is easier to spread the dough with either; oil or your hands/gloves or by putting some oil on the dough.
Let the bases proof for approximately 30 mins in a warm moist environment. Turn your oven on to 210 C.
If you are proofing in your oven put on the timer for ~20 mins. When the time is up take the proofing dough out of the oven and turn the oven up to 210 C. The 20 mins is an estimate, it will depend on how long it takes your oven to reach 210 C.
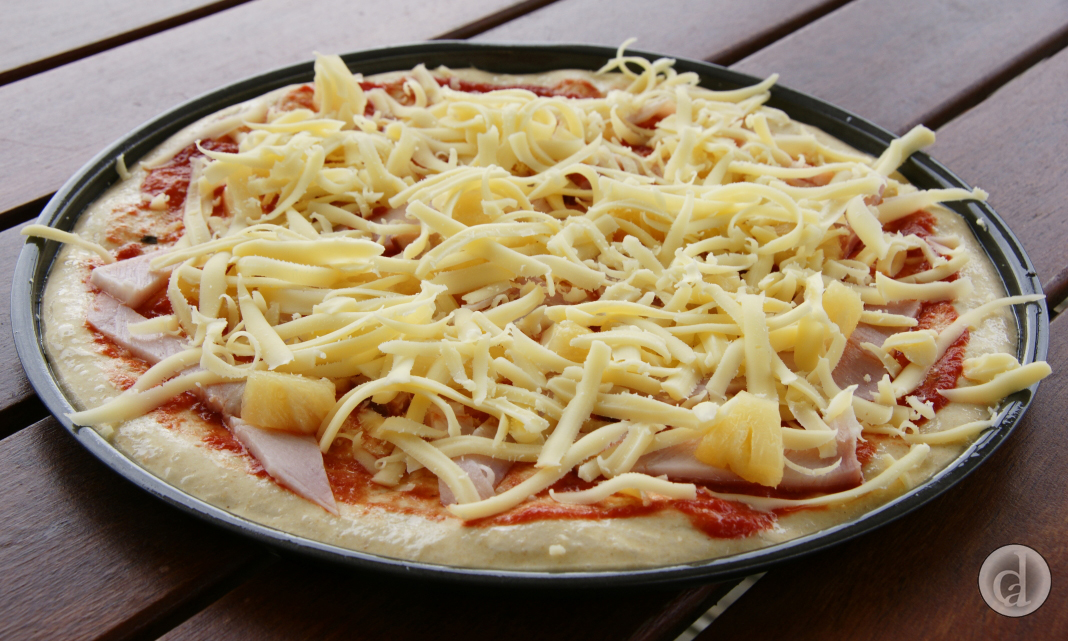
Now comes the fun part of gently putting on the toppings. I say gently because you don't want to deflate the dough too much. If you put too much topping on or the toppings are too wet the dough will be doughy after it is cooked. The following photos are some of my pizzas (pre & post baking) with a "dry" topping (mushrooms, shaved pumpkin, spinach leaves, caramelised onion & goats chevre) & a "wet" topping (plenty of mozzarella, ham & pineapple).


Bake at 210 C, the time will vary depending on the individual oven & what your toppings are. I bake most of my pizzas for 15 mins. If your oven has a hot spot turn the pizza halfway through baking.
So what do they look like when they are out of the oven?


During baking the dough shrinks a little from the sides however it is easy to remove the pizza from the pan. If left in the pan for too long it may stick a little. The following photos are of side views of the pizzas shown above.


Have fun working out what toppings to put on your pizza.

